How to Make the Origami Wing
Origami Wings-new style
Text, photos and inventor : Jens Pilgaard - Denmark
Many years ago Steve Fernandez from USA showed me how to make Otzingerwings and wonderwings by folding feathers and use the stem as backbone in a wing, leaving the front made of the fragile fibres, by cutting the top of the feather away. All the time I thought that these wings was too fragile, so after playing around with feathers for a while I invented what became the Origami wing ( named after Japanese paper folding art) .
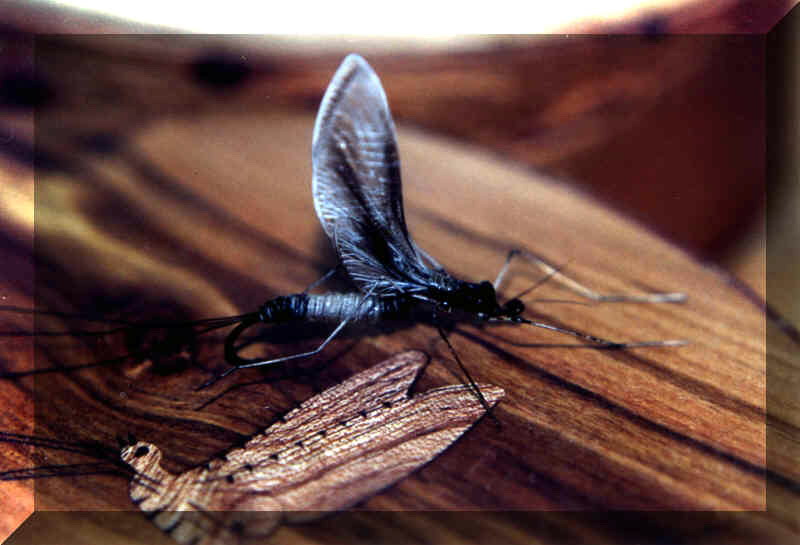
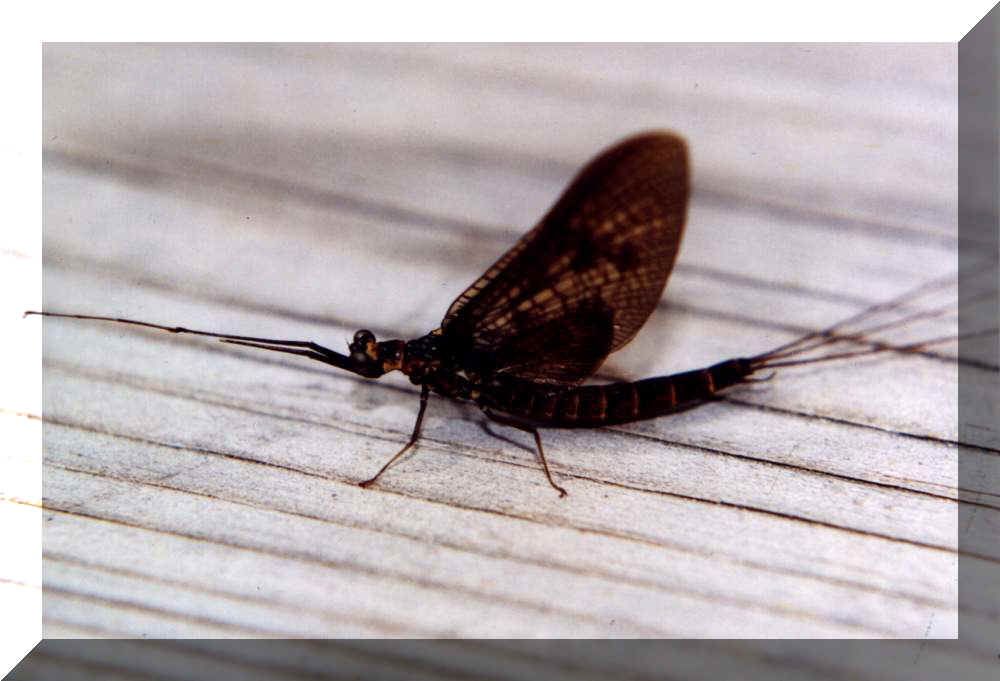
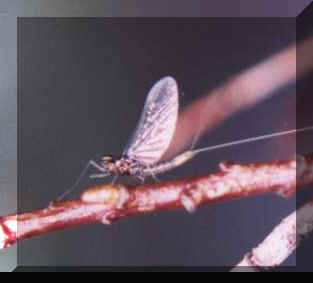
This way of using the feathers own structure added another dimension into the final results by bringing natural curves and lines into my flies that I had never seen before. I was amazed by the similarity of the wings from real insects and the artificial ones made out of a single feather. Shortly after this I discovered, that this way of using the feathers gave me some unforeseen advantages that I could use, not only in my super realistic flies, but also in my fishing flies.
I think I am now entitled to say that this is one of the fastest ways of tying winged dry flies, and at the same time, one of the most effective too, so what more can one want.
Just remember that the flies should only be tied for fishing in smaller sizes because the wing has a tendency of getting stiff when it comes to bigger flies such as big mayflies ( Danica etc.)
Using this type of wing for your flies will give you the ultimate imitation of the insect and believe me, it matters when it comes to luring the old "brownie " or " His Eminence", the grayling.
Last but not least I find it very satisfying to be able to tie a fly that is beautiful as well as functional. It sorts of gives me a greater pleasure of performing my hobby weather it is sitting tying the flies or fishing with them on a nice and sunny day in June.
I will also show you how to make the most simple super realistic dry fly ever, utilising this wing. The only materials you need is a hook and a hacklefeather with long fibres and a thin stem.
Put a dry fly hook into the vise and tie in a tail and a body for the fly you want to imitate, leaving Ľ of the shank in front free for wing and hackle ( never use more than one wing per fly. This will prevent them from twisting)
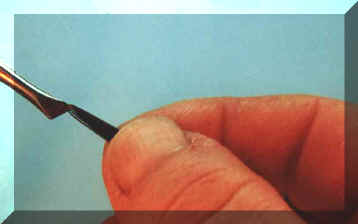
Now you take a hacklefeather in the desired colour ( not dyed) with long fibres. Hold the hackle up in front of you at the tip with the front side towards you and strip off the fibres on the left side and all the fluff at the bottom on both sides
On the middle of the stem you give the hackle a small bend to the right and here you now grip the feather with a pair of tweezers with FLAT jaws ( often found in first aid kits or beauty boxes) , holding the tweezers in your LEFT hand pointing
down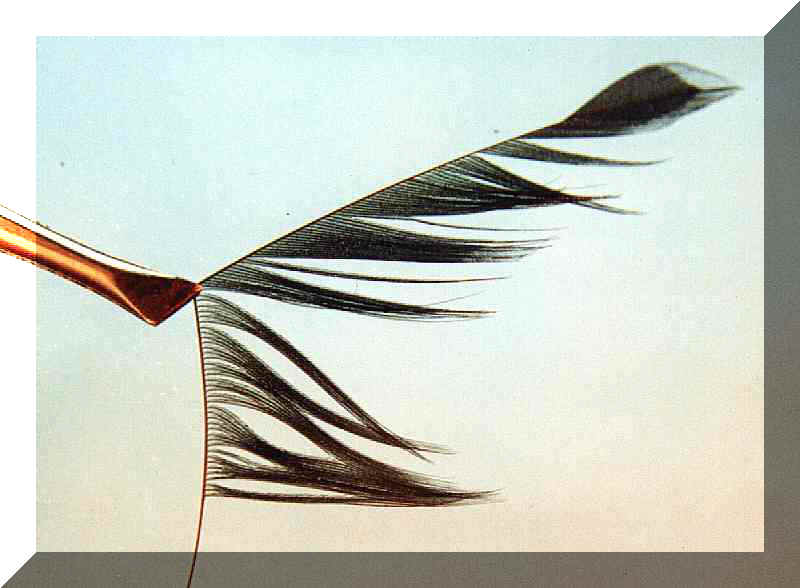
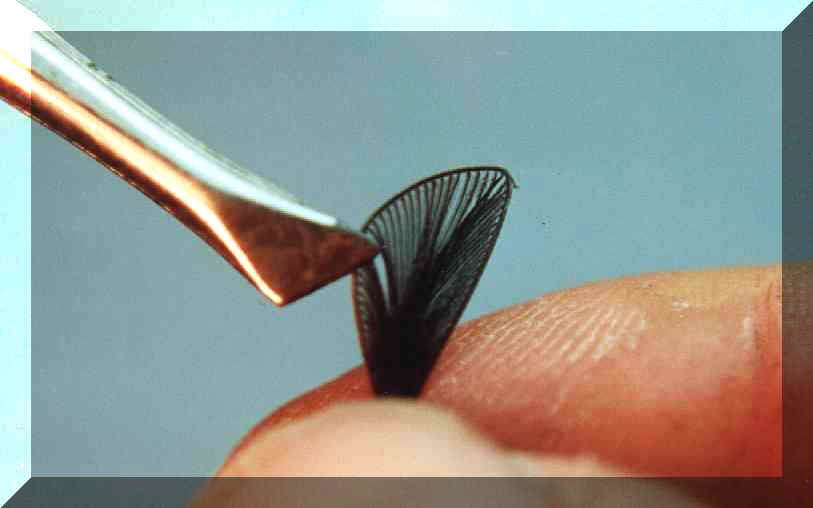
With your right hand you now pull down all the fibres and both stems alongside each other until the desired height of the wing is obtained
Holding the wing in your RIGHT hand you now pull out the backside of the wing to a delta-shape with the tweezers in your LEFT hand still pressing on the root to secure the wing from deforming. Make sure to pull it out as far down as possible to get a true wing shape . And also try to pull it out in small jerks - out and upwards - like a 1/4 circular move
After doing this you measure out the wing over the body of the fly as you would have done with a traditional wet-fly feather wing, and now with your left hand run the thread around the wing root at least 3 times before you let go the bobbing first and then the wing. Here You have to be careful not to let go of the wing in your right hand before you have let go of the bobbin so you don't happen to pull the thread unexpectedly.. Otherwise the wing will deform and you then will have to bend it again
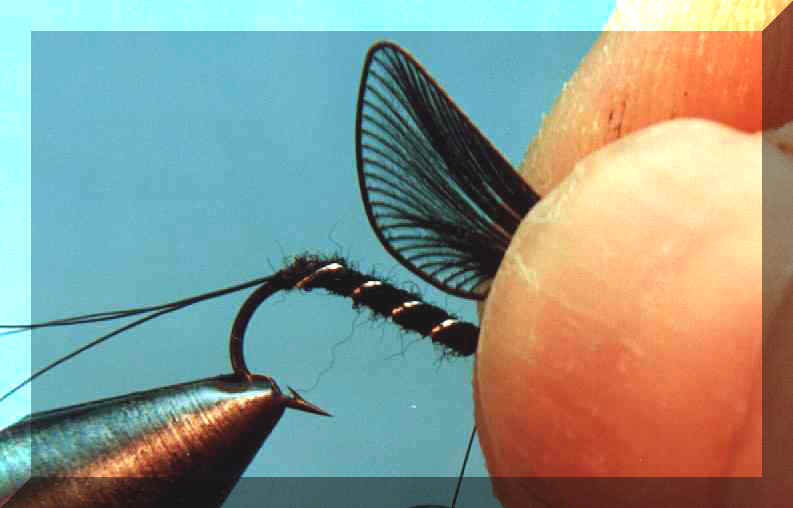
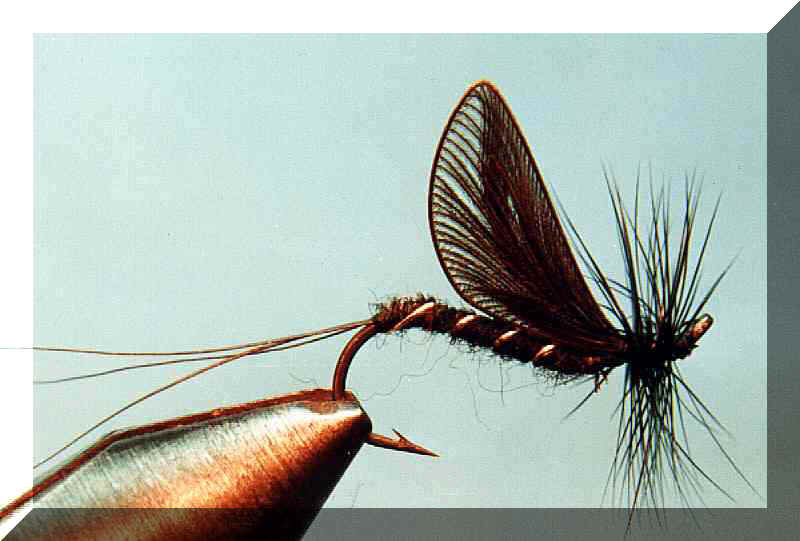
All what is left now is to tie it down as you would have done with a feather wing for wet flies, cut away the waste ends of the wing and put on a suitable hackle for the fly ,
If You are an enthusiastic tier of Daddy Longlegs, You now got a chance of trying something new. Instead of tying a single wing in upright as on the small mayfly you simply pre-tie two wings like this: take about 25 centimetres of tying thread and make a loop on the middle and run one end through it two times. Then you follow the steps illustrated on Pictures no.1-2-3-4 . After pulling down the stems alongside each other you take the loop over the wing and tighten the knot. Make one more wing like this just with the fibres pulled of on the opposite side so that the wings will form a pair when tied on the fly. Now you just tie down the wings one after the other flat on the back of the fly.
This technique is also good for small midges but make sure to choose feathers with thin stems so that the wings stay as soft as possible.
The simple super realistic fishing fly I was mentioning earlier is made the same way, leaving out the tail and body.
Here you attach the thread to the hook 2/3 up the shank and tie down the wing as described above.
Cut away the two waste-stems , making sure not to cut away the surplus fibres pointing towards the head of the fly.
Now you take some of these fibres and fold them backwards alongside the shank side and tie them in with a single turn of thread or two. This is repeated on the other side of the hook and finally the rest of the fibres pointing forward is divided with a few turns in the figure of eight. Finish the fly with a few half hitches around the wing root and seal it with a drop of lacquer.
Now you have got a very simple but most effective mayfly imitation holding all the necessary ingredients for a successful outcome : A body ( the hook shank will imitate this)- The wing ( which is a well known shape to the fish )- and the legs ( the surplus fibres are almost like a parachute hackle if tied in right).
Do not get frustrated if your fly lands on the surface on the side. This will only signal to the fish that here comes an easy pray. Those laying on the sides are bound to stay on the surface opposite those who sit upright and capable of getting away any time. It is also possible to make the wing out of C.d.C. feathers which makes it even more floating.
I hope you will enjoy tying these flies as much as I do and that they will give you some good moments along the streamside as well as at the flytying-bench.
Tight Lines and best of luck Jens Pilgaard